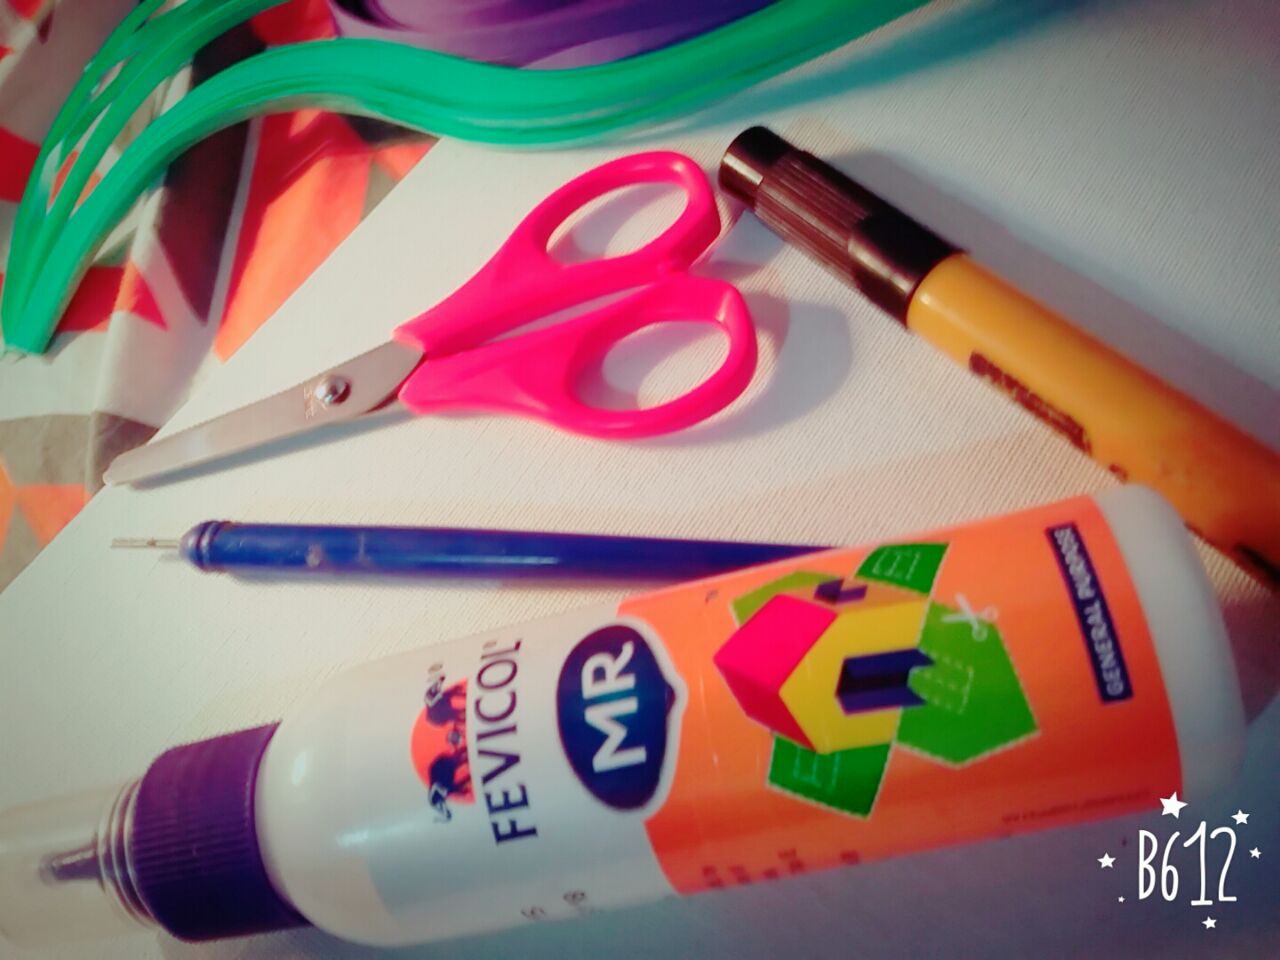
Sunday 31 July 2016

Wildflower bouquet - Tutorial.

                                             WILDFLOWERS


Material required:
  • 5mm quilling strips
  • Quilling tool
  • Colour paper
  • Fevicol

Before you begin put on your positive patience pants on ...and then chant this mantra "Be patient with yourself, nothing in nature blooms all year".


                              ::  Procedure  ::

STEP 1: Roll circles using dark pink strips & leaf shapes using light pink strips. Use 1 strip for each circle and leaf. 
12-LIGHT PINK LEAF....30-DARK PINK CIRCLES

                                   STEP 2: THE PETAL!
Place the light pink leaf in between the circles. Join and glue 'em together as shown above. Take half a dark pink strip and wrap it around the petal.

         
   STEP 3: THE FLOWER!!
      Make 15 such petals for 5 per flower. Join and stick 'em.

           STEP 4: A BIT OF GREEN!!

Cut out leaves and stem and as my green color paper was dull, I colored it to make it bright.


           STEP 5: LIL TOUCH UP!!
Cut out yellow strips , join and glue 3 together. Roll the ends and make swirls, add rhinestone in the middle or you can just make a dot using sketch pens.


              STEP 6: ARRANGEMENT!!

Once your done with the components, its time to arrange & stick 'em.
*TIP* Crease the leaves, gives it a edgy look and push the petals upward after sticking, it stand out.


AMBRACADABRA!!!!

So that is how its done. Once your're done with it ,give yourself a pat on the back and sit back and admire your work. Oh! and do share it with me..
 XX CHEERS XX


Saturday 24 October 2015

The PINK bouquet.. (tutorial)

                               MATERIALS REQUIRED:

                                    1. Quilling strips: PINK, PURPLE, GREEN (5mm)
                                    2. Fevicol
                                    3. Scissors 
                                    4. Quilling tool
                                    5. A4 size sheet ( colour of ur choice)

PROCEDURE:

                               MAKING THE ELEMENTS FOR THE BOUQUET 

STEP 1 :      Take the purple strips and stick 2 strips together.


STEP 2 : Take a circular object( the fevicol bottle will do) and roll the paper strip around the bottle and apply fevicol at the end of the roll nd stick it to make a circle.

STEP 3: Take the circle and pinch on the sides to make a eye shaped outer covering of the petal. Make five such shapes for each flower.

STEP 4: Take the pink strips and make 'S' kinda swirls like shown in the picture below. Next apply fevicol inside the outer covering of the petal and fill it with the pink swirls..


STEP 5: Make 15 such petals for 3 flowers.. and stick them to make the flower. Next make a tight coil with purple strip and stick it on top of the flower.

STEP 6: Similarly make 2 more small flowers using a smaller circular object while making the outer covering for the petal.

STEP 7: Using the green strips make leaves , little swirly green things and the stem of the bouquet.

STEP 8: Make a cute lil  bow..

 STEP 9: Once the elements are finished .... START arranging and sticking em!!


STEP 10: TA-DA!!!! Sit back and admire your creation...!!!

Until next time.. Au Revoir people!!!!


Saturday 8 August 2015

THE LADY...(tutorial)


Materials required:

  • Quilling strips (size:5mm&2-3mm) (multicolour)


  • Quilling tool
  • Fevicol
  • Scissors
  • Black sketchpen


  • And... PATIENCE!!

PROCEDURES:

Once  you have gathered all the materials (especially ur patience)...Begin quilling the lady!!

STEP 1: Make tight coils..
roll LOADS of coils!!!!

STEP 2: After rolling the coils, take a sheet and sketch the lady's body using a sketchpen..


STEP 3: Now, start sticking the coils in the shape of a gown..

STEP 4: Make a simple butterfly..

STEP 5: Stick the butterfly near the hand of the lady...

And...VOILA ITS DONE!!!